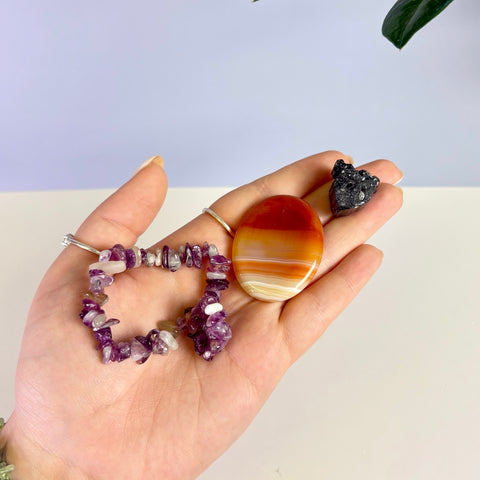
Grief Relief Bundle

Price: $12.00 USD

*Pay in 4 interest-free payments with PayPal. (PayPal approved customers only)

Important Care Info

Amethyst is photosensitive, so long periods in bright sunlight can fade or shift its colour. Display away from strong direct sun.

Amethyst and Tourmaline are piezoelectric, which means they can create a small electrical charge when pressure is applied. This is a natural physical property, not a safety issue, but it is worth knowing when handling or displaying the material.

Amethyst
Amethyst forms lilac to violet quartz points, clusters, and geode linings. Its purple colour comes from iron-related colour centres changed by natural radiation. It is chosen for spiritual transformation and intuition.

Pieces with deep natural purple, crisp zoning, large clean points, and undamaged geode edges are especially valued.

Pisces, Aquarius, and Sagittarius zodiac energy.

Ruled by Jupiter and Neptune.

Third eye (intuition) and Crown (spirituality) chakras.

Tourmaline
Tourmaline has a deep, grounding presence that is rich, steady, and quietly powerful. Tourmaline is a chemically complex mineral group whose crystals can carry several colours in one piece. It is chosen for protection and grounding.

Transparent crystals with vivid colour, clean terminations, and attractive colour zoning are especially valued.

Libra and Capricorn zodiac energy.

Ruled by Saturn and Mercury.

Root (stability) chakra.

Carnelian
Carnelian has warm red-orange colour with a translucent chalcedony body. The colour comes from iron oxides in chalcedony and may be natural or enhanced by heat. It is chosen for creativity and confidence.

Naturally saturated orange-red colour, high translucency, and little treatment are especially valued.

Leo, Virgo, and Taurus zodiac energy.

Ruled by Sun and Mars.

Sacral (creativity) and Solar plexus (power) chakras.

Please read our FAQ for any questions.

Each crystal is naturally unique, so no two are identical. The photos represent sample pieces. When you purchase one, you will receive a single crystal unless otherwise stated. Size, colour, and shape may differ from the images shown.

If you select a numbered option (for example, 111), you will receive one crystal at that price. Colour and shape may vary, but quality and value remain consistent. Staff cannot provide the exact crystal shown in the sample photo, so please do not request it.

If you select a lettered option (for example, A), you will receive the exact crystal shown in the photo.